Demystifying Siri, Part 2: Creating a Custom Intent
In Part 1 of our series on exploring Siri’s capabilities we discussed the possibility of creating a custom intent to make some of our app’s functionality accessible via Siri. At the end of this part we should be able to access our shortcut through the Shortcuts app, and by speaking a custom phrase in Siri.
Disclaimer: At the time of writing Xcode 11.6 is current as is iOS 13. Things may change in future versions!
Creating a new custom intent
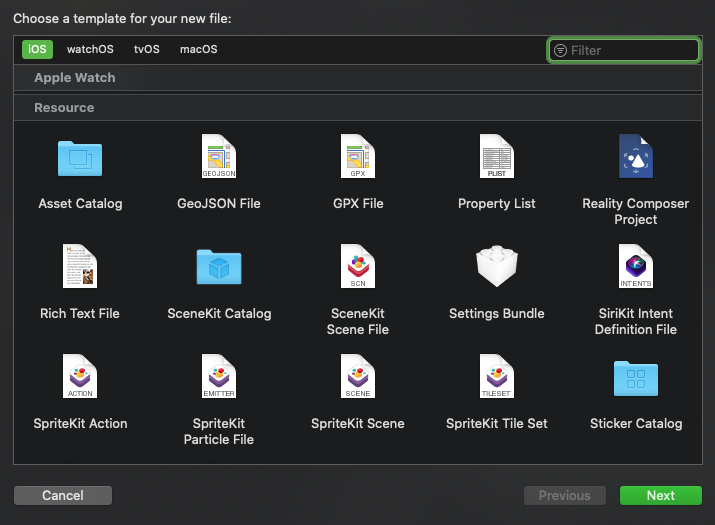
I have an Xcode project called NumberRace. In order to create a custom intent we need to add a SiriKit Intent Definition File to this project. From the Xcode menu, select File > New > File… and, from the dialog box that appears, select “iOS” from the top and, in the “Resource” area, select SiriKit Intent Definition File. (In the diagram below, it’s on the right hand side in the middle row.)
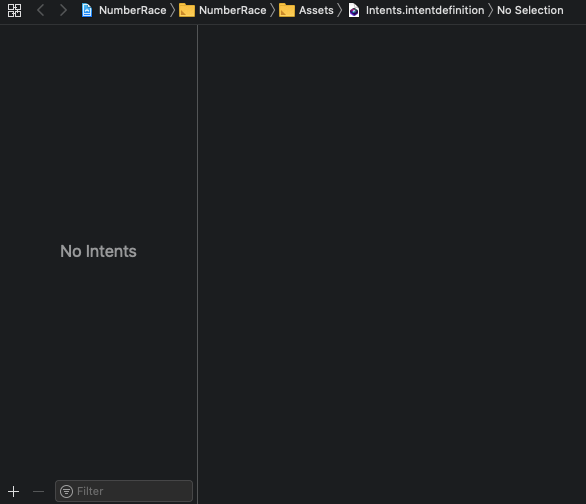
This file can hold one or more intents so you can save the file in your preferred location as Intents.intentdefinition. There are no intents defined at the moment so let’s remedy that by clicking on the + sign at the bottom left.
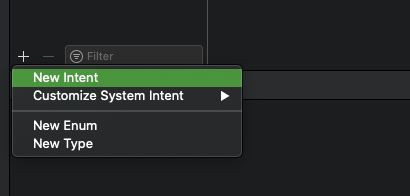
Choose New Intent from the context menu.
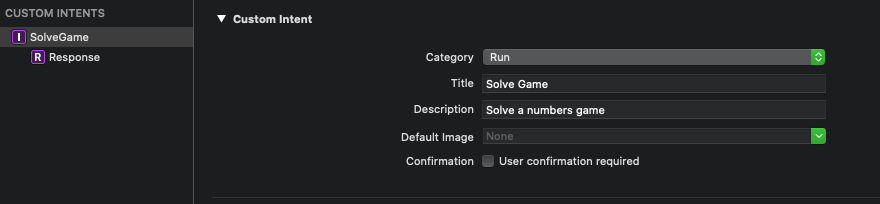
We can now begin defining our custom intent. We’ll call it SolveGame - changing the name in the left hand pane has nicely updated the title in the right hand pane.
We now need a category. Remember that Siri only supports certain verbs in specific categories, for example Order, or Show, and choosing a category here influences how Siri talks about your intent. We’ll use a generic verb for now. **Run** will do. We’ll add a description here too.
Finally we don’t need user confirmation. If we were making a payment through an intent, a confirmation step is needed to make sure that the amount and payee are correct and there are no nasty financial slip-ups. In our case, there’s no harm done if any of the information is incorrect, so we can leave this box unchecked.
New in Xcode 12

UPDATE: since writing this guide, it appears that a few more checkboxes have been added to this section of the Intents interface in Xcode 12. Make sure you also have the Configurable in Shortcuts and Suggestions boxes checked before proceeding!
Parameters
We now need some parameters. To enable the solver to do its job, we’ll need:
- A target number - a three digit integer between 100 and 999;
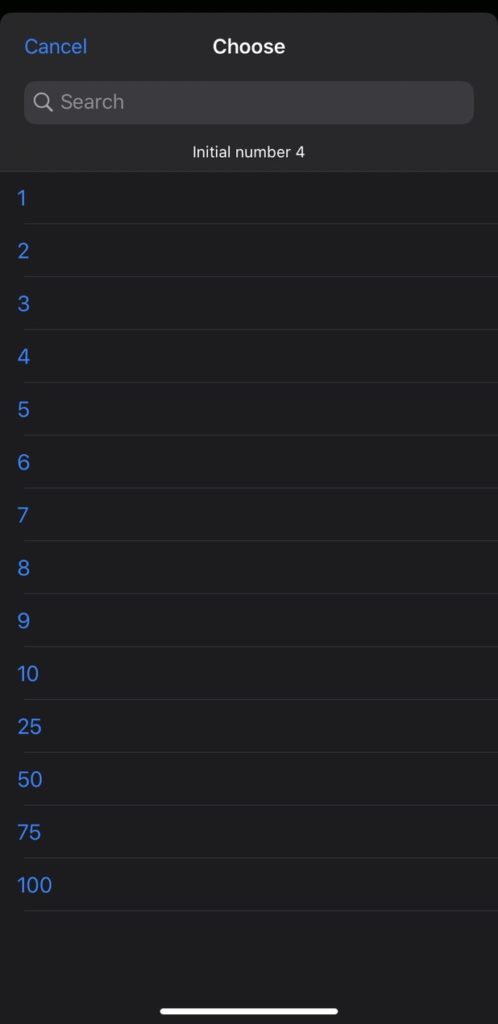
- Six initial numbers - each number can be either a smaller one from 1 to 10, or a larger one - 25, 50, 75, 100
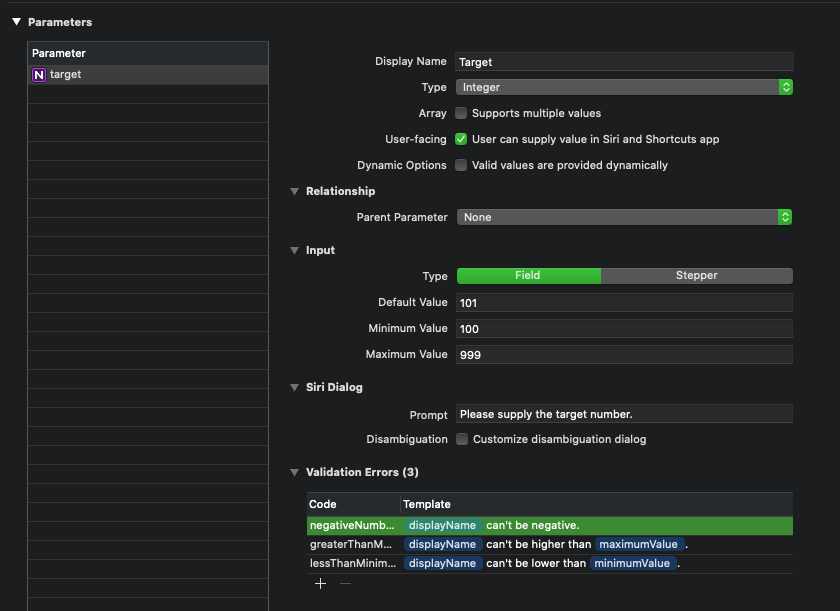
Our target number is easy to define. Click on the + sign and type target. Is type is an Integer and it is user-facing. We can supply default, minimum and maximum values, and a phrase to request the parameter when we eventually hook our intent up to Siri’s voice assistant.
But what about our initial numbers? We could use six integers to represent the six initial numbers, but we need to be a bit more restrictive than that as the user should only be able to select the numbers 1-10, 25, 50, 75 or 100. I’m going to opt for an enum so that the user can choose only those valid values. This may be a bit cumbersome but we’ll try it and see how it works.
Creating an enum
Click on the + sign at the bottom left of the pane, and select New Enum. Give it a name of InitialNumber. Next, create all the cases - one per possible value. I may live to regret this, but anyway that’s how I’ve done it, as pictured in the screenshot below.
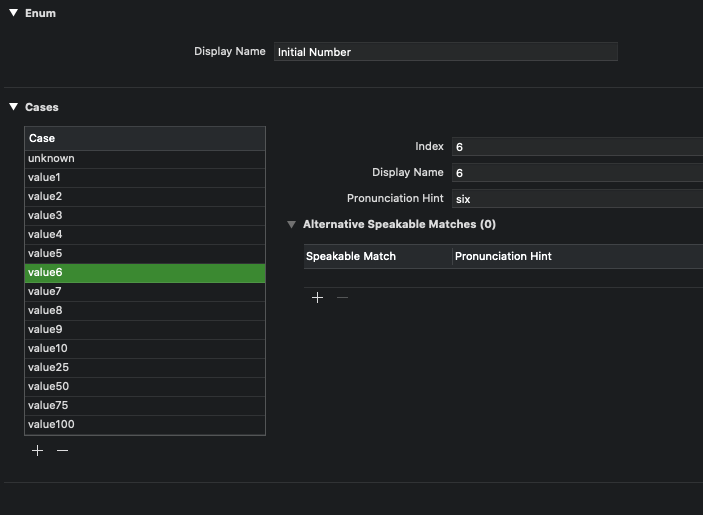
For each possible number we have a case .value<x> with an index matching our number. You’ll notice that I’ve also added a pronunciation hint. I’m not sure this is needed as I hope Siri can pronounce numbers!
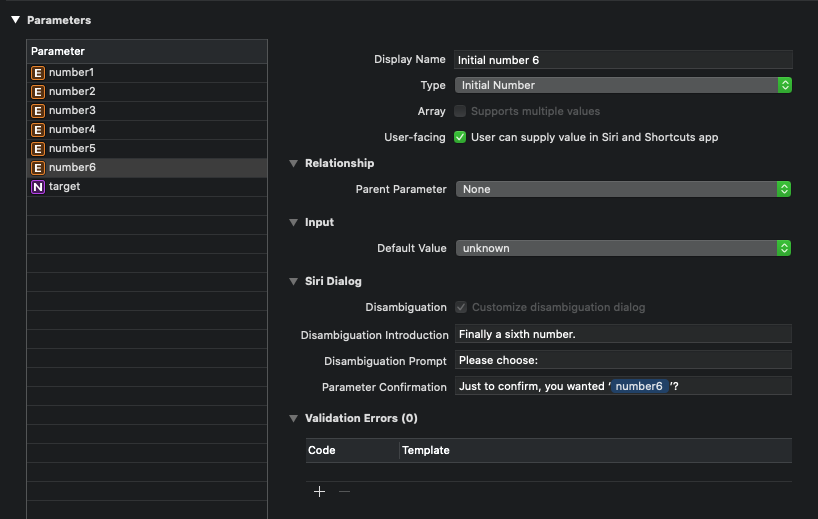
Let’s move back to our Solve Game intent and add our initial number parameters. We’ll make each initial number parameter user-facing, so that the user can supply the value in Shortcuts.
We’ve updated the Siri Dialog too, ready for when we have our interactive voice interface.
Configuring Shortcuts
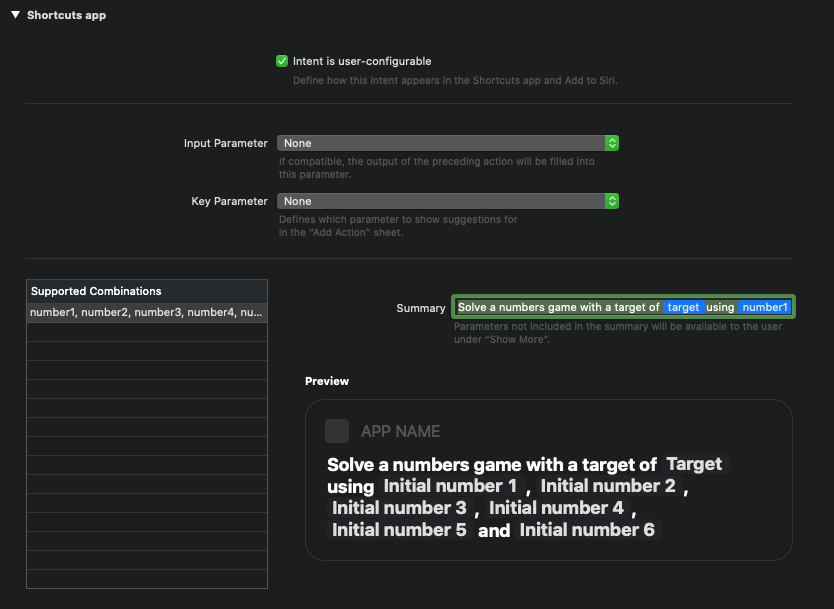
The next section determines how our custom intent appears in the Shortcuts app. We’re going to make the intent user-configurable, which means that the user can choose to run the shortcut with some, all or none of our parameters pre-filled in.
For example, a user could create a shortcut to always solve a numbers game with a target of 342. The shortcut would prompt the user for the initial number values before handing control over to NumberRace.
Or the user could populate all the values in the shortcut. In that case, when the shortcut is run, the solver is opened with the same values each time. Not that there’s much point to that, but still - it’s possible.
We’ll add a summary - type in the following:
Solve a numbers game with a target of target using number1, number2, number3, number4, number5 and number6
Ensure that when you type the words in bold that you select the parameter from the box that appears. Bingo - we have an intent that can be used in the Shortcuts app!
Incidentally, Apple’s Human Interface Guidelines suggest avoiding punctuation as we have done here. So eventually we may have to come up with another suitably pithy sentence. That’s for another day though.
We should now have enough information to test our intent. Let’s build our project, open Shortcuts and see if it works.
Open the Shortcuts app and click on the Create Shortcut button.
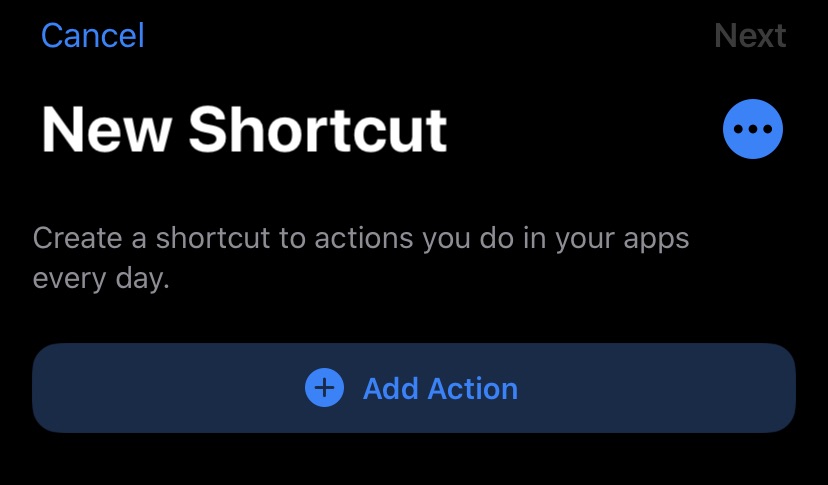
Click on Add action and select our app. Success! Our Solve Game intent is listed.
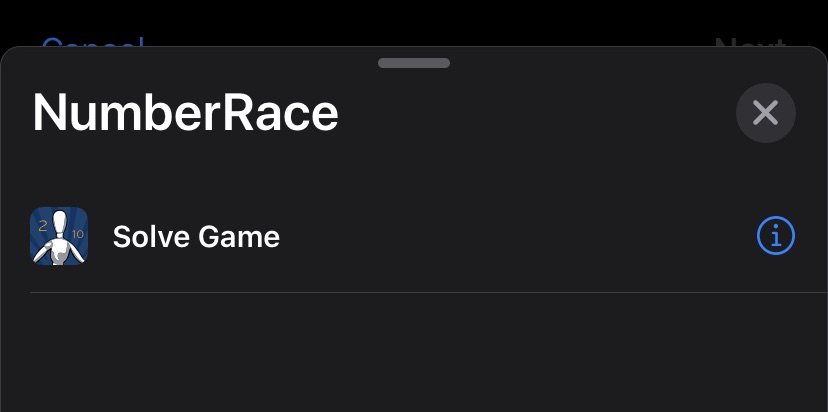
Select that action and we can configure it how we wish.
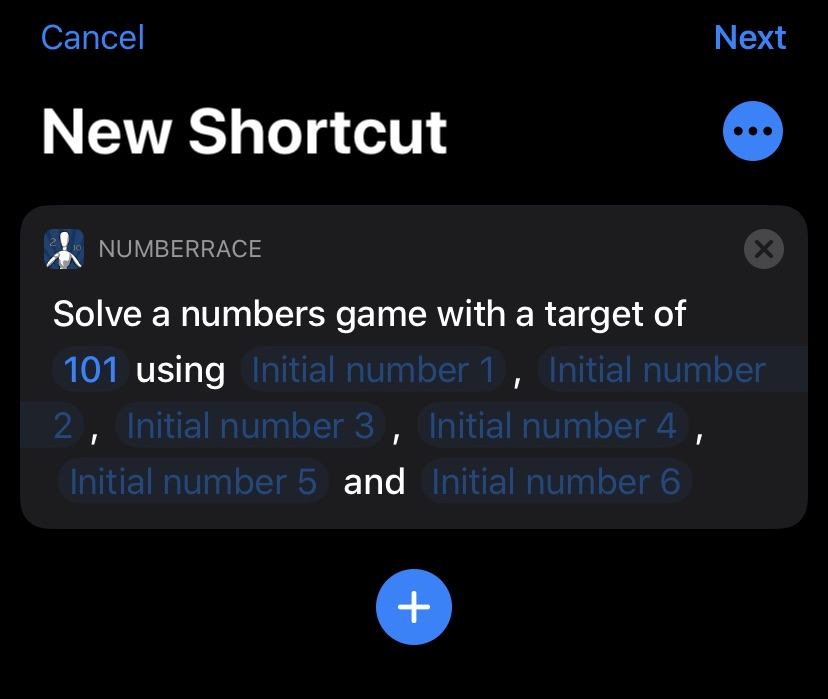
Let’s choose a target number and ask the user every time for the target numbers…

Clicking on the Play button will take us through our shortcut and, sure enough, we get asked for some initial numbers…
The NumberRace app opens… and gets stuck on the main menu.

Progress! Sort of!
We’ve created a shortcut and it gathers the correct values. But our app doesn’t know what to do next. It’s time to write some code. We’ll do this next, in Part 3.