Electronic Shelf Labels, Part 4: Home Assistant
At the end of Part 3, we were able to use OpenEPaperLink to send a slew of interesting content to my cheap Bluetooth-only Electronic Shelf Label (ESL) from AliExpress. We can display images, a weather forecast, Google Calendar appointments - even electricity tariffs. But what about custom content? My ultimate goal is to show the dates for the next waste collection day. Could I design an appropriate view to send periodically to my label?
Bin days
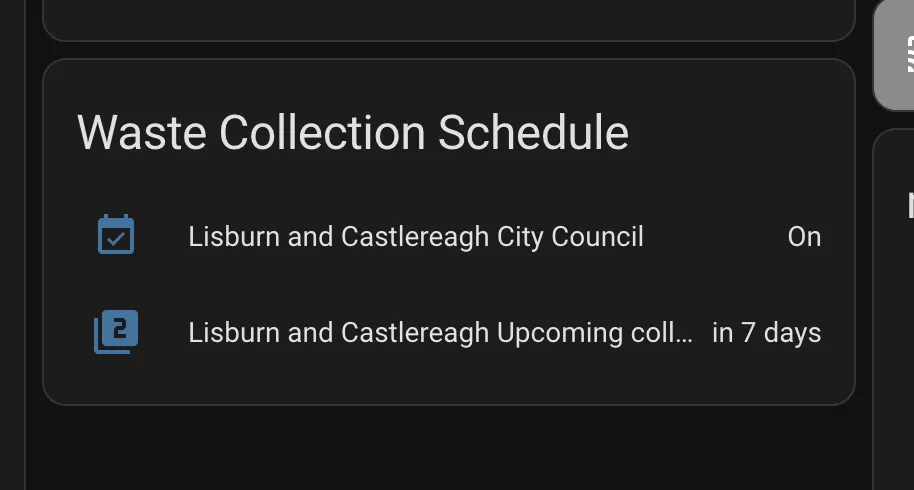
Firstly I needed to see if my local council (Lisburn and Castlereagh) offered an API for waste collection dates. It appeared not, so I was resigned to screen-scraping the council website. But then I came across a waste collection schedule plugin for something called Home Assistant, a free and open-source home automation platform that serves as a central hub for managing and controlling smart home devices. I’d come across Home Assistant before, during my OpenEPaperLink research, so I knew one could talk to the other.
Home Assistant was therefore looking like the likely way forward.
Overkill!
You’ll remember that in Part 1, I was reluctant to fire up a new Virtual Machine to run Node.js because I felt the solution was becoming too weighty for my needs. Now, I’m actively installing a Home Assistant VM, running its own operating system, HAOS, on my Synology. I tried to justify this behaviour by thinking of the many benefits of this approach, as I could control many smart devices and set up automations. The possibilities are endless!
I was finding myself getting dragged into the world of smart home automation without really trying.
The process was remarkably easy. Once I’d got Home Assistant up and running, I installed the Home Assistant Community Store add-on. From there, I was able to install the waste collection schedule add-on which provides dates for hundreds of different providers, including my local council.
In Home Assistant, states and sensors are fundamental components. So a light switch would be described as a ‘sensor’
and its ‘state’ would be either on or off. And we can automate behaviours based on the states - the values -
reported by those sensors. For example,
if I install the companion app on my phone, and Home Assistant subsequently detects that I’ve arrived home, it can switch on
the lighting in the hall or even play a welcoming tune on my smart speaker.
But we’re getting ahead of ourselves. Our waste collection add-on provides our collection schedule as sensors and we can read the states of those sensors - the next collection dates - and do interesting things with them.
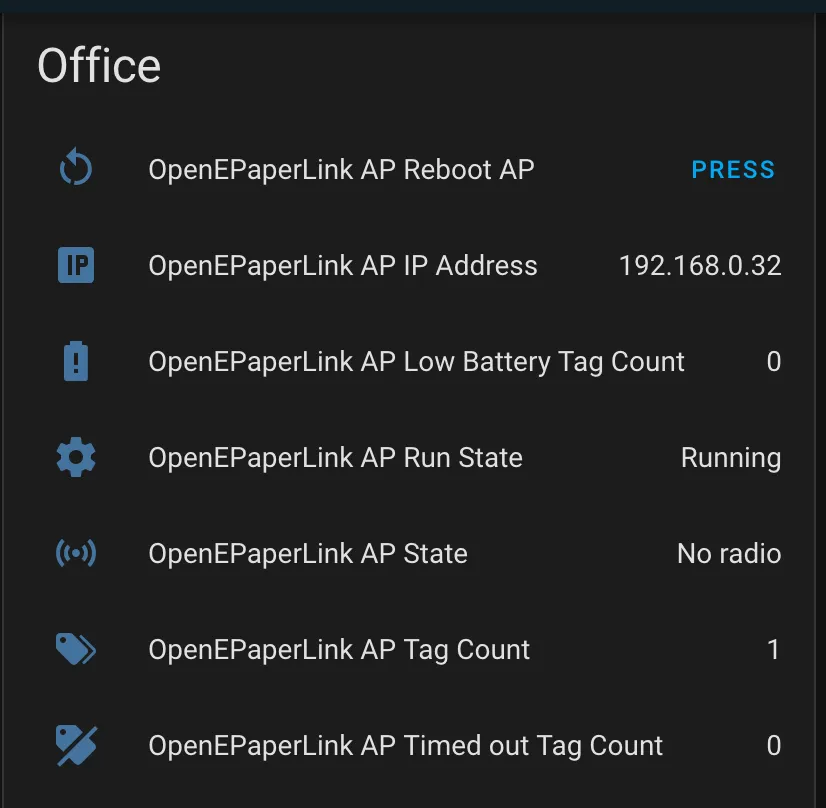
The next step is to install the OpenEPaperLink add-on. Once we point the add-on to the IP address of the Access Point then we have a ton of new sensors to play with.
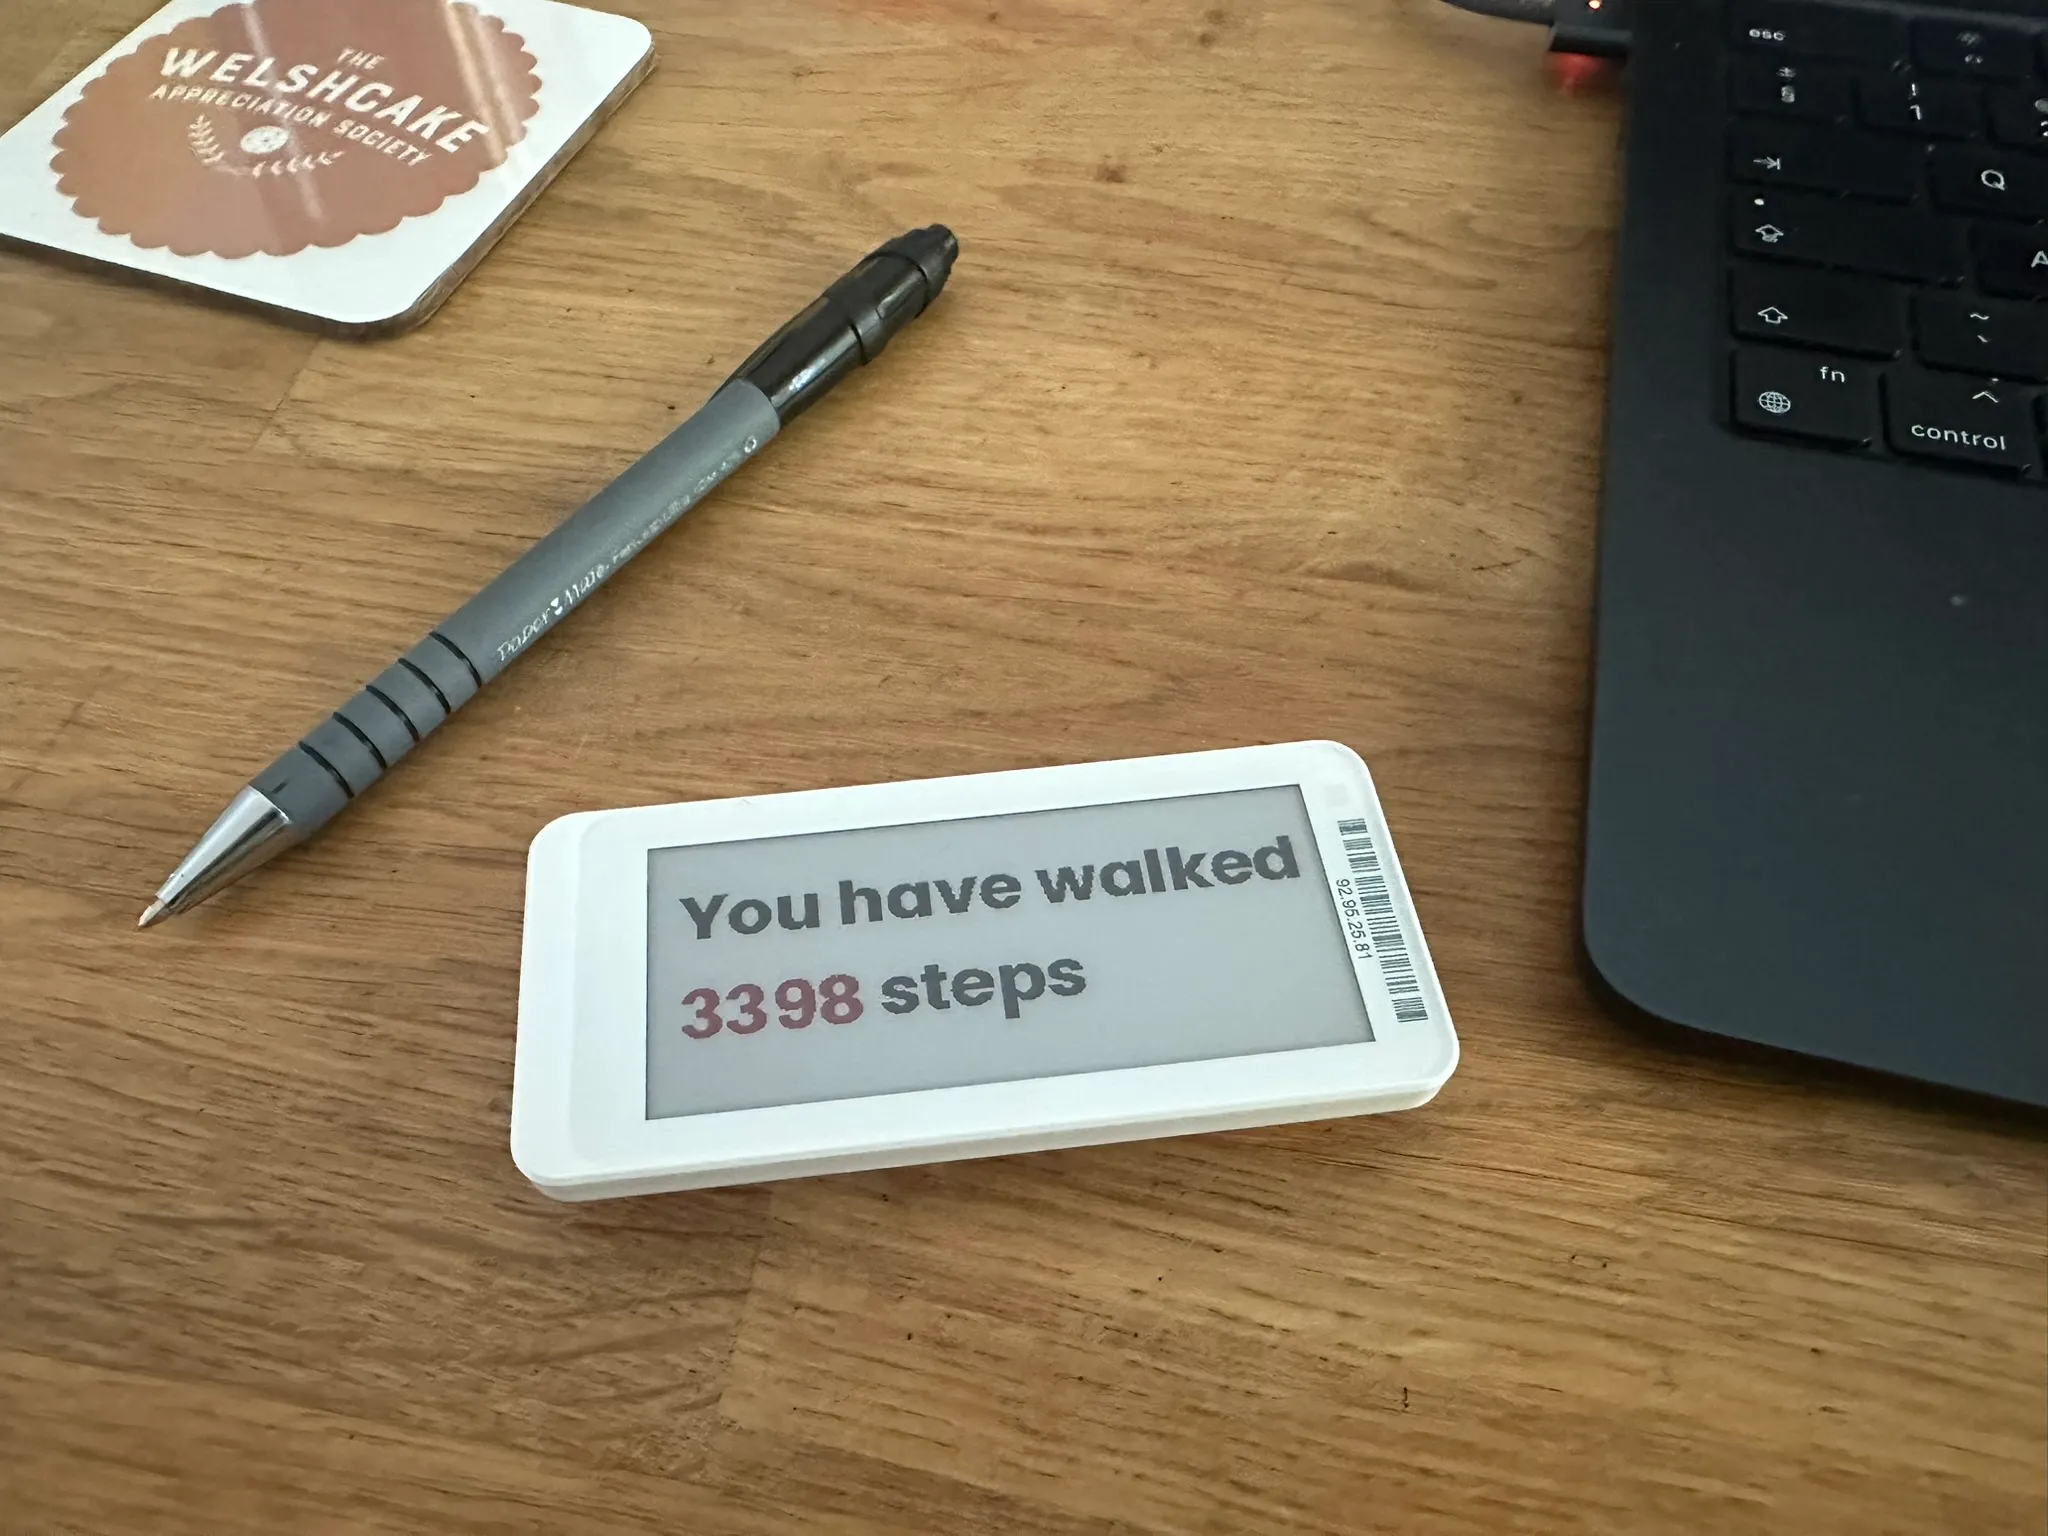
Now we can take any information from our sensors, and use the drawcustom functionality of the OpenEPaperLink add-in
to create a little dashboard of information. For example, when I first connected my Access Point to Home
Assistant, I couldn’t resist making a little dashboard of my step count for the day.
So many possibilities! But let’s get back on track.
We can add an automation that runs periodically - I’ve chosen it to run every 6 hours - that reads the waste collection
sensor then uses drawcustom to create and send an image to the ESL. A YAML template is used to describe the image.
You can describe text, lines, boxes and icons to draw the image you want. I’ll maybe share the template I have to
draw the finished product at some point but, for now, behold its beauty!
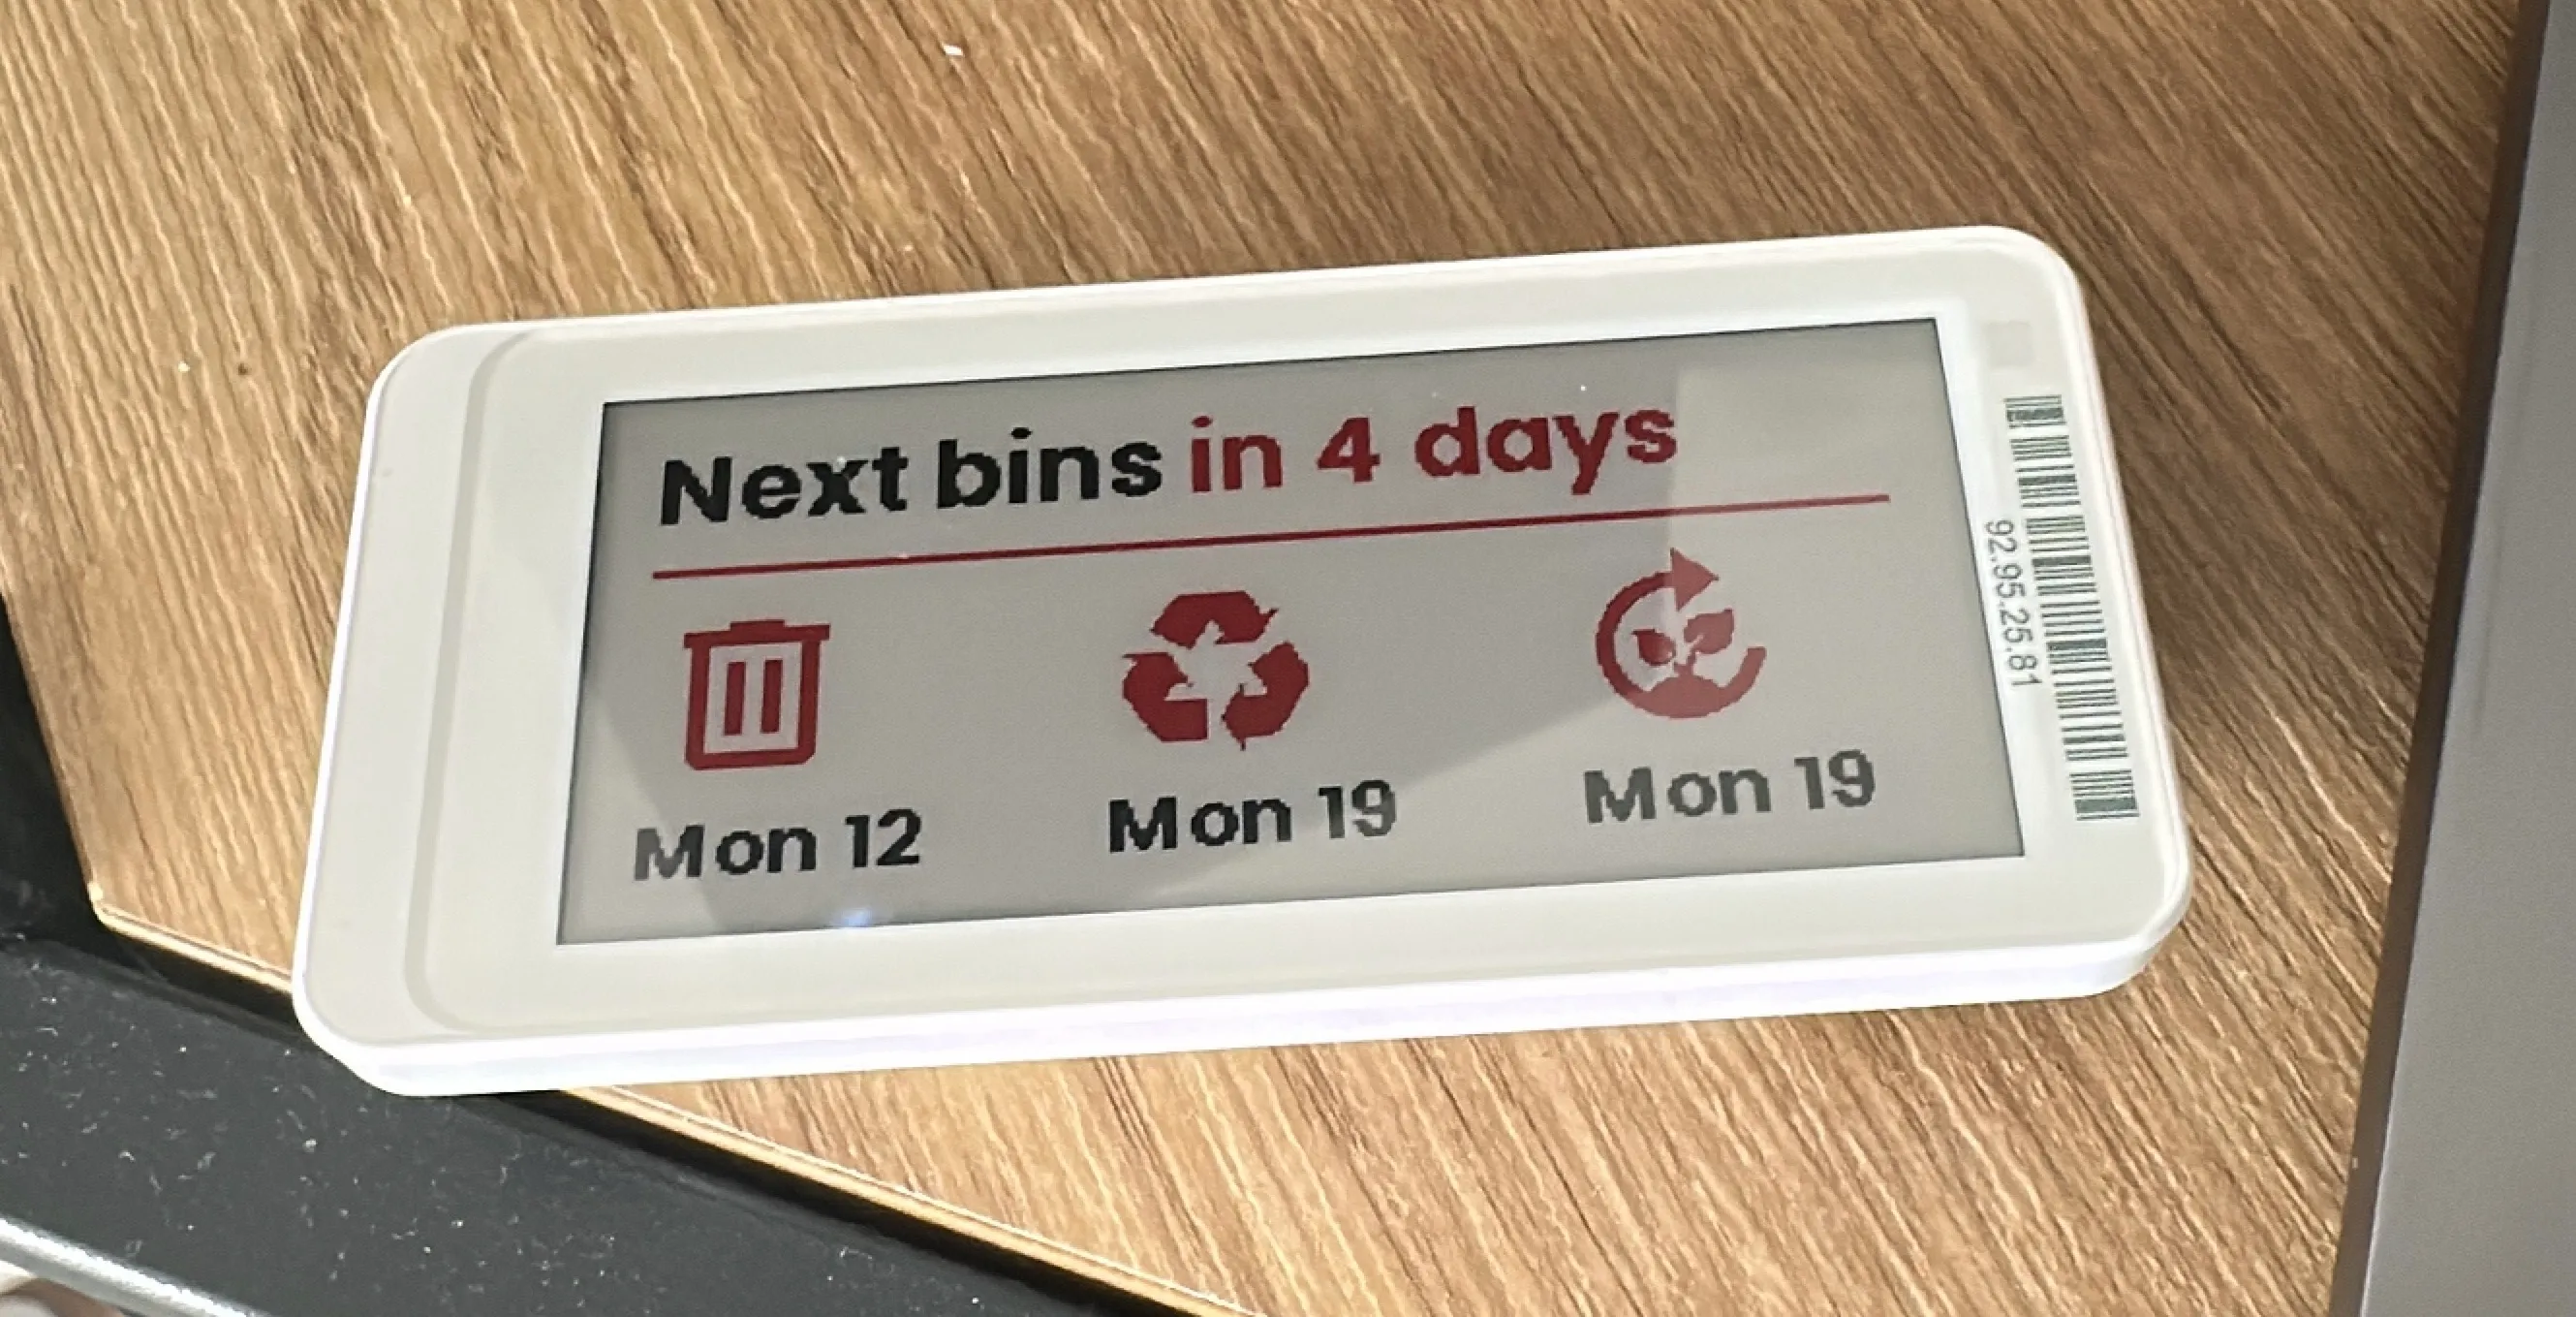
And there we go, a working waste collection day monitor. I wasn’t quite prepared to go in the direction I did, but I now have a shiny new home automation system to play about with too. And maybe ask my local Spar for some more labels!